Flying Drone DIY, part IV: custom autopilot programs
Executive summary
According to my development schedule, the next version of the drone should cover camera and video transmission. However, I got a request to help with the programming part, and it moved me to a point that had been planned only for the 4th version of the drone.
One request is to help automate drone return when it loses control in the area of electronic warfare equipment influence. Another request is to automate drone navigation by the optical flow. This publication covers the start of programming drone behavior and mid-term results.
I successfully set up and tune all necessary emulation software and developed my first program for a drone. It helps to evaluate the SDK, API, and nuances of air vehicle navigation.
From two requests above I started with the second one. I decomposed the issue and started work on it step by step. I have completed recognition visual objects on the video stream, achieved satisfactory detection of AprilTag markers, packed it all together into a pipeline and supplied it to the drone.
Technically, it works, but results should be improved: a. do not trigger changes in altitude on change of focal point b. better recognize change in tilt of surface. These would be the next steps.
First autopilot program
Operation with drone goes over MAVLink protocol. There are several options how you could operate with it: plain low level, mavsdk, dronekit, ROS\ROS2. DroneKit is a superior toolset, but its development is discontinued, ROS toolkit is narrow specialized, so MAVSDK is natural choice with fallback to low level API when it is necessary.
                    async def connect_drone():
                        drone = System()
                        await drone.connect(system_address="udpin://127.0.0.1:14550")

                        print("Connecting to drone...")
                        async for state in drone.core.connection_state():
                            if state.is_connected:
                                print("Drone discovered!")
                                break
                        return drone
Code snippet is self-explanatory. It worth to note a special format
of UDP address - udpin. When you run operator command and simulation
environment on the same machine, you have distinguish listeners and
writer in this manner.
                    async def arm_and_takeoff(drone):
                        default_alt = 1.7 # by default 2 meters is a target alt on takeoff (1.7 for gazebo iris_runaway)
                        print("Arming drone...")
                        await drone.action.arm()

                        print(f"Taking off to {default_alt} meters...")
                        await drone.action.takeoff()

                        async for pos in drone.telemetry.position():
                            alt = pos.relative_altitude_m
                            print(f" Altitude: {alt:.1f} m")
                            if alt >= default_alt * 0.95:
                                print("Reached target altitude")
                                break
                            await asyncio.sleep(0.5)
Code is self-explanatory, except a few interesting moments. The first
one is arm could fail -- arming a drone requires several pramaters
to be met as a part of safety check; the process could be prolong
in time and in production-ready scenario you have run extra check
within exponential backoff algorithm before command arm. The second interesting moment is a physical nature of subject which has been programmed here. You have to wait until physical motors do its job, in one or another way this waiting should be implemented.
                    async def reach_altitude(drone, target_alt):
                        async for position in drone.telemetry.position():
                            alt = position.relative_altitude_m
                            print(f"Altitude: {alt:.1f} m")
                            if alt >= target_alt:
                                print("Reached target altitude")
                                break

                            await drone.offboard.set_position_ned(PositionNedYaw(0.0, 0.0, -target_alt, 0.0))
                            await asyncio.sleep(0.5)
The code is self-explanatory, except NED. NED = North–East–Down is a
local Cartesian coordinate system referenced to the drone's current
position. X (North) → North
Y (East) → East
Z (Down) → Down
Used in almost all autopilots (ArduPilot, PX4). The key point is all calculation depends the start of coordinate system. Calling "Send to north" twice with the same value 80m, makes drone flight on 80m, not for 160m.
As a first step working in drone programming I work with simulation environment. There are several options, but QGroundControl is linux native. All together it shown good results. The whole code snippet together with instruction for deployment is available by this link.
Auto Stabilization R&D
Visual control
QGroundControl is good for many aspects, but it is a 2D map visualization, for my next task I would need visual confirmation of drone's tilt which requires 3D perspective.
There is several solutions for it and Gazebo is among the most popular ones. It has several caveats on installation, e.g. mandatory option of --model json, otherwise it will start a wrong server, but community is rich and helpful, so you should not have serious blockers.
Object recognition
The initial task has been decomposed on several smaller parts. At first we have to stabilize drone not by image of the surface itself, but by ArUco markers. During development it was discovered the demo video I used has AprilTag instead of ArUco (they have many similarities, so it is easy to mix them up) and a different set of algos should be used to operate with them.
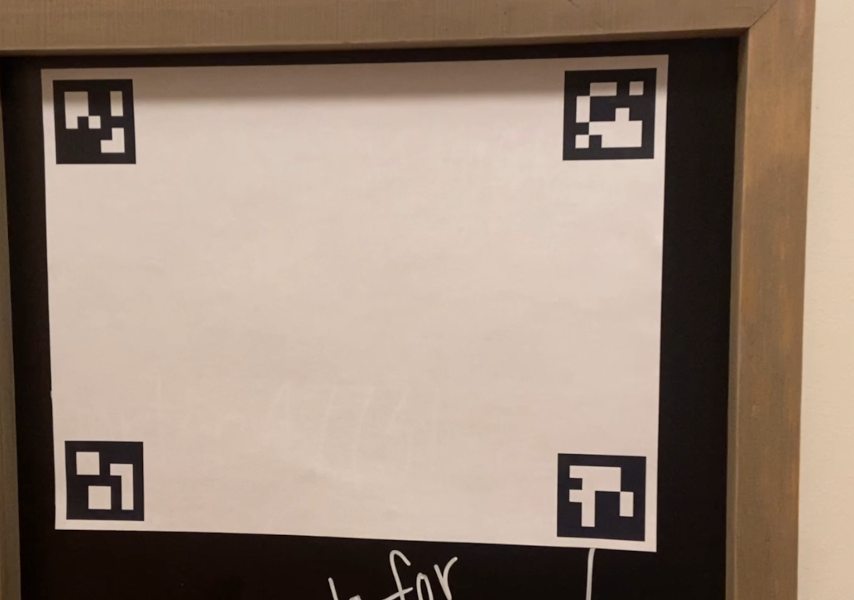
The first goal is to recognize this marker on a single frame.
Direct launch classic opencv algorithms gaves unsatisfactory results. During R&D I ended up with approach prepare images -> find squares as tag candidates -> pass each tag to the AprilTagDetector.
def find_squares(self, frame, min_area=2000, max_area=15000, aspect_tol=0.3): gray = cv2.cvtColor(frame, cv2.COLOR_BGR2GRAY) blur = cv2.GaussianBlur(gray, (5, 5), 0) edges = cv2.Canny(blur, 50, 150) contours, _ = cv2.findContours(edges, cv2.RETR_EXTERNAL, cv2.CHAIN_APPROX_SIMPLE) squares = [] for cnt in contours: epsilon = 0.02 * cv2.arcLength(cnt, True) approx = cv2.approxPolyDP(cnt, epsilon, True) if len(approx) == 4 and cv2.isContourConvex(approx): x, y, w, h = cv2.boundingRect(approx) area = w * h ratio = w / float(h) if h else 0 if area >= min_area and area <= max_area and abs(ratio - 1) < aspect_tol: squares.append((x, y, w, h)) return squares
| Stage | Operation | Algorithm / Method | Purpose |
|---|---|---|---|
| Preprocessing | Color to Grayscale | Color space conversion | Reduces image dimensionality and prepares data for intensity-based gradient analysis. |
| Preprocessing | Gaussian Blur | Gaussian convolution | Suppresses high-frequency noise and stabilizes gradient computation for edge detection. |
| Edge Detection | Canny Edge Detector | Canny (Sobel + hysteresis) | Detects strong and weak edges based on image gradients, producing a binary edge map. |
| Contour Extraction | Find Contours | Suzuki–Abe algorithm | Extracts connected edge boundaries as ordered point sets representing object outlines. |
| Shape Approximation | Polygon Approximation | Douglas–Peucker | Simplifies contours by reducing the number of points while preserving the overall shape. |
| Geometric Validation | Convexity Check | Convex hull test | Filters out non-convex shapes that cannot represent valid square-like objects. |
| Geometric Filtering | Bounding Box & Aspect Ratio | Axis-aligned bounding box | Applies area and aspect-ratio constraints to reject objects that do not match expected square geometry. |
                        def detect_tags_in_roi(self, roi):
                            gray = cv2.cvtColor(roi, cv2.COLOR_BGR2GRAY)
                            return self.apriltag_detector.detect(gray)

                        def detect_apriltag(self, frame, squares):
                            best = None

                            for (x, y, w, h) in squares:
                                roi = frame[y:y+h, x:x+w]
                                tags = self.detect_tags_in_roi(roi)

                                for t in tags:
                                    corners = np.array(t.corners)
                                    side = np.mean([
                                        np.linalg.norm(corners[0] - corners[1]),
                                        np.linalg.norm(corners[1] - corners[2])
                                    ])
                                    cx = corners[:, 0].mean() + x
                                    cy = corners[:, 1].mean() + y

                                    if not best or side > best.px_size:
                                        best = TargetDetection(cx, cy, side, "tag")

                            return best
After squares (april tags potential candidates) they has been found,
they are passed to OpenCV tag detector to recognize an AprilTag.
                        def estimate_distance_from_px(self, px_size):
                            if px_size <= 0:
                                return None
                            return (self.focal_length_px * self.tag_size_m) / px_size
The distance is estimated using a pinhole camera model, where
the real object size and its projected size in pixels are
related through the camera focal length.
                        async def _iteration(self, target_alt):
                            frame = await self.video.read()
                            if frame is None:
                                await self._on_frame_lost()
                                return

                            detection = self.tracker.process(frame)

                            if self.tracker.is_lost():
                                print("[Safety] Target lost → landing")
                                await self.hardware.land()
                                self._run = False
                                return

                            if detection:
                                vx, vy, vz, _ = self.velocity_ctrl.compute(detection, target_alt)
                                await self._send_velocity_safe(vx, vy, vz)
                            else:
                                await self._hover_if_needed()

                            self._draw_debug(frame, detection)
                            self._display(frame)
This code snippet shows a high level of process described above.
When distance is calculated based on the recognized AprilTag,
this data send to the drone to stabilize its flight.
There are many more things behind the scene, but format of the publication allows to focus on key things. The whole code is available on github.
A few related publications:
Flying Drone DIY, part V: custom autopilot programs -- improving computer vision of drone
Flying Drone DIY, Part III: Assembling and Tuning
Flying drone DIY, part II: configuration for the 1st version
Flying drone DIY, part I: discovery phase